3 Ingredient MeatLoaf (2 Minute Prep, 1 Hour Bake)

3 Ingredient MeatLoaf (2 Minute Prep, 1 Hour Bake Time) #Meatloaf #3IngredientRecipes #Recipes


Ok… The secret is out! You can make the most delicious meatloaf with only 3 ingredients … Yes, literally THREE INGREDIENTS! This meatloaf is also a major winner because it takes only one hour to bake, and like two seconds to throw together! Well, ok, maybe like two minutes… but still — Amazing!


3 Ingredient MeatLoaf – Prep Time: 2 Min, Bake Time: 1 Hour


I make this meatloaf all of the time for my family when I am in a rush, but still looking for something tasty and hearty. And its definitely my go-to meal for when my father-in-law stops by! Continue reading

Make The Best Pizza Ever!


Pinterest


Want to make the BEST PIZZA ever??! Its really not that hard! Time after time, I make pizza for my guests and they love it…. and they always want to know what is my secret?! 😉

So what is my secret? Well, it’s not only superb — but super-simple too! The answer is…. Even distribution, but of course! All you have to do, is take all of your toppings (including the cheese), and mix them together in a bowl before spreading them on your pizza! Secretly Superb!

DIY Rose Petal Air Freshener In A Mason Jar

6I recently celebrated my birthday — 29 and Feelin’ Fine! And to my amazement… My husband actually bought me flowers! [Side Note: Guys, if you’re reading this, buy your lady some flowers! Seriously, on any day — it will make her day! Or even pick some! LOL] They were beautiful red roses and they smelled so amazing, that when they started to wilt about a week later, I thought to myself — How can I make these last longer?! So, this is what I came up with! Not only does it smell SO good, it took like 10 minutes to make! Seriously! 😀

Step 1: The first thing that I did was remove the rose heads from the stems. Then I used my trusty Uloo and an old cutting board to chop them up.

Step 2: Next, I sprinkled some regular old table salt onto the chopped up rose petals. I then placed them into my mason jar.

Step 3: I then doubled up a small piece of tulle, covered the jar opening, screwed on the lid, and then trimmed the edges that poked out. I them wrapped a small string of pearls around the neck of the jar for “garnish”!

That’s it! Super easy & Super cute! Remember to give your Air Freshener a little shake every once in a while to revive the beautiful aroma! And, if you liked this post, you will LOVE my good friend Courtenay’s DIY Mercury Glass Mason Jar Air Freshener!

The Flyest Fruit Fly Trap Ever! – [Dr. Sista-Thang-Says!]

1Guess what…. I can actually buy fruit now! I no longer have to worry about those super-annoying, super-gross fruit flies! (And yes, I actually quit buying fruit because of this!) — My Sista-Thang actually passed this one on to me, and it works soooo good! Thanks SO much Michelle, for sharing this awesome secret with us! 🙂

What you’ll need:

– 1/4 cup of Apple Cider Vinegar

– 1 Tspn of Dish Detergent

– 1 Glass

– Saran Wrap

All you need to do is mix the Apple Cider Vinegar with the Dish Detergent in the glass. Next cover the glass with Saran Wrap and poke some holes in it. And — That’s it! (Seriously!)

How it works: The Apple Cider Vinegar attracts the pesky fruit flies into the glass through the holes in the Saran Wrap. Once the fruit fly is in there the Dish Detergent weighs the little guy down, and the sucker is TRAPPED! Yes! Awesome! 🙂

Double-Baked-SMASHED! Potatoes

Double-Baked-SMASHED! Potatoes — Prep Time: 60 minutes, Bake Time 20 min

These Double-Baked-Smashed!-Potatoes are probably my most favorite  BBQ/dinner side! Not only are these potatoes super yummy, they are also very simple to make…. Just follow the recipe below for detailed instructions, and enjoy! 🙂

All you’ll need is:

  •  8 Potatoes
  •  1 package of Cream Cheese
  •  1 small Onion, chopped
  •  1/8 cup of Ranch Dressing
  •  1 1/2 cups of Cheddar Cheese, shredded
  •  1 Tbsp. of Margarine or Butter
  •  1/4 cup of Milk or Cream
  •  1/4 Tsp. of crushed Garlic
  •  1/2 package of diced, cooked Bacon or Bacon Bits
  •  Dash of Salt & Pepper
  •  Fresh Chives for garnish

Step One: Wash and slice all of the potatoes in half, the long way. Place all potato halves face down on a baking sheet. Cover the bottom of the baking sheet with 1cm of water, and bake in the oven for 45 minutes at 350 degrees Fahrenheit.

Tip: If you are worried about the potatoes sticking, cover the baking sheet with a light coating of vegetable oil or butter.

Step Two: After potatoes have been baked and cooled to touch, use a spoon to carefully scrape out the potato skins into a large bowl.

Step Three: Add the milk and butter to the potatoes, and mash as you would in order to make “regular” mashed potatoes.

Tip: Reheat the mixture in the microwave to help with mashing.

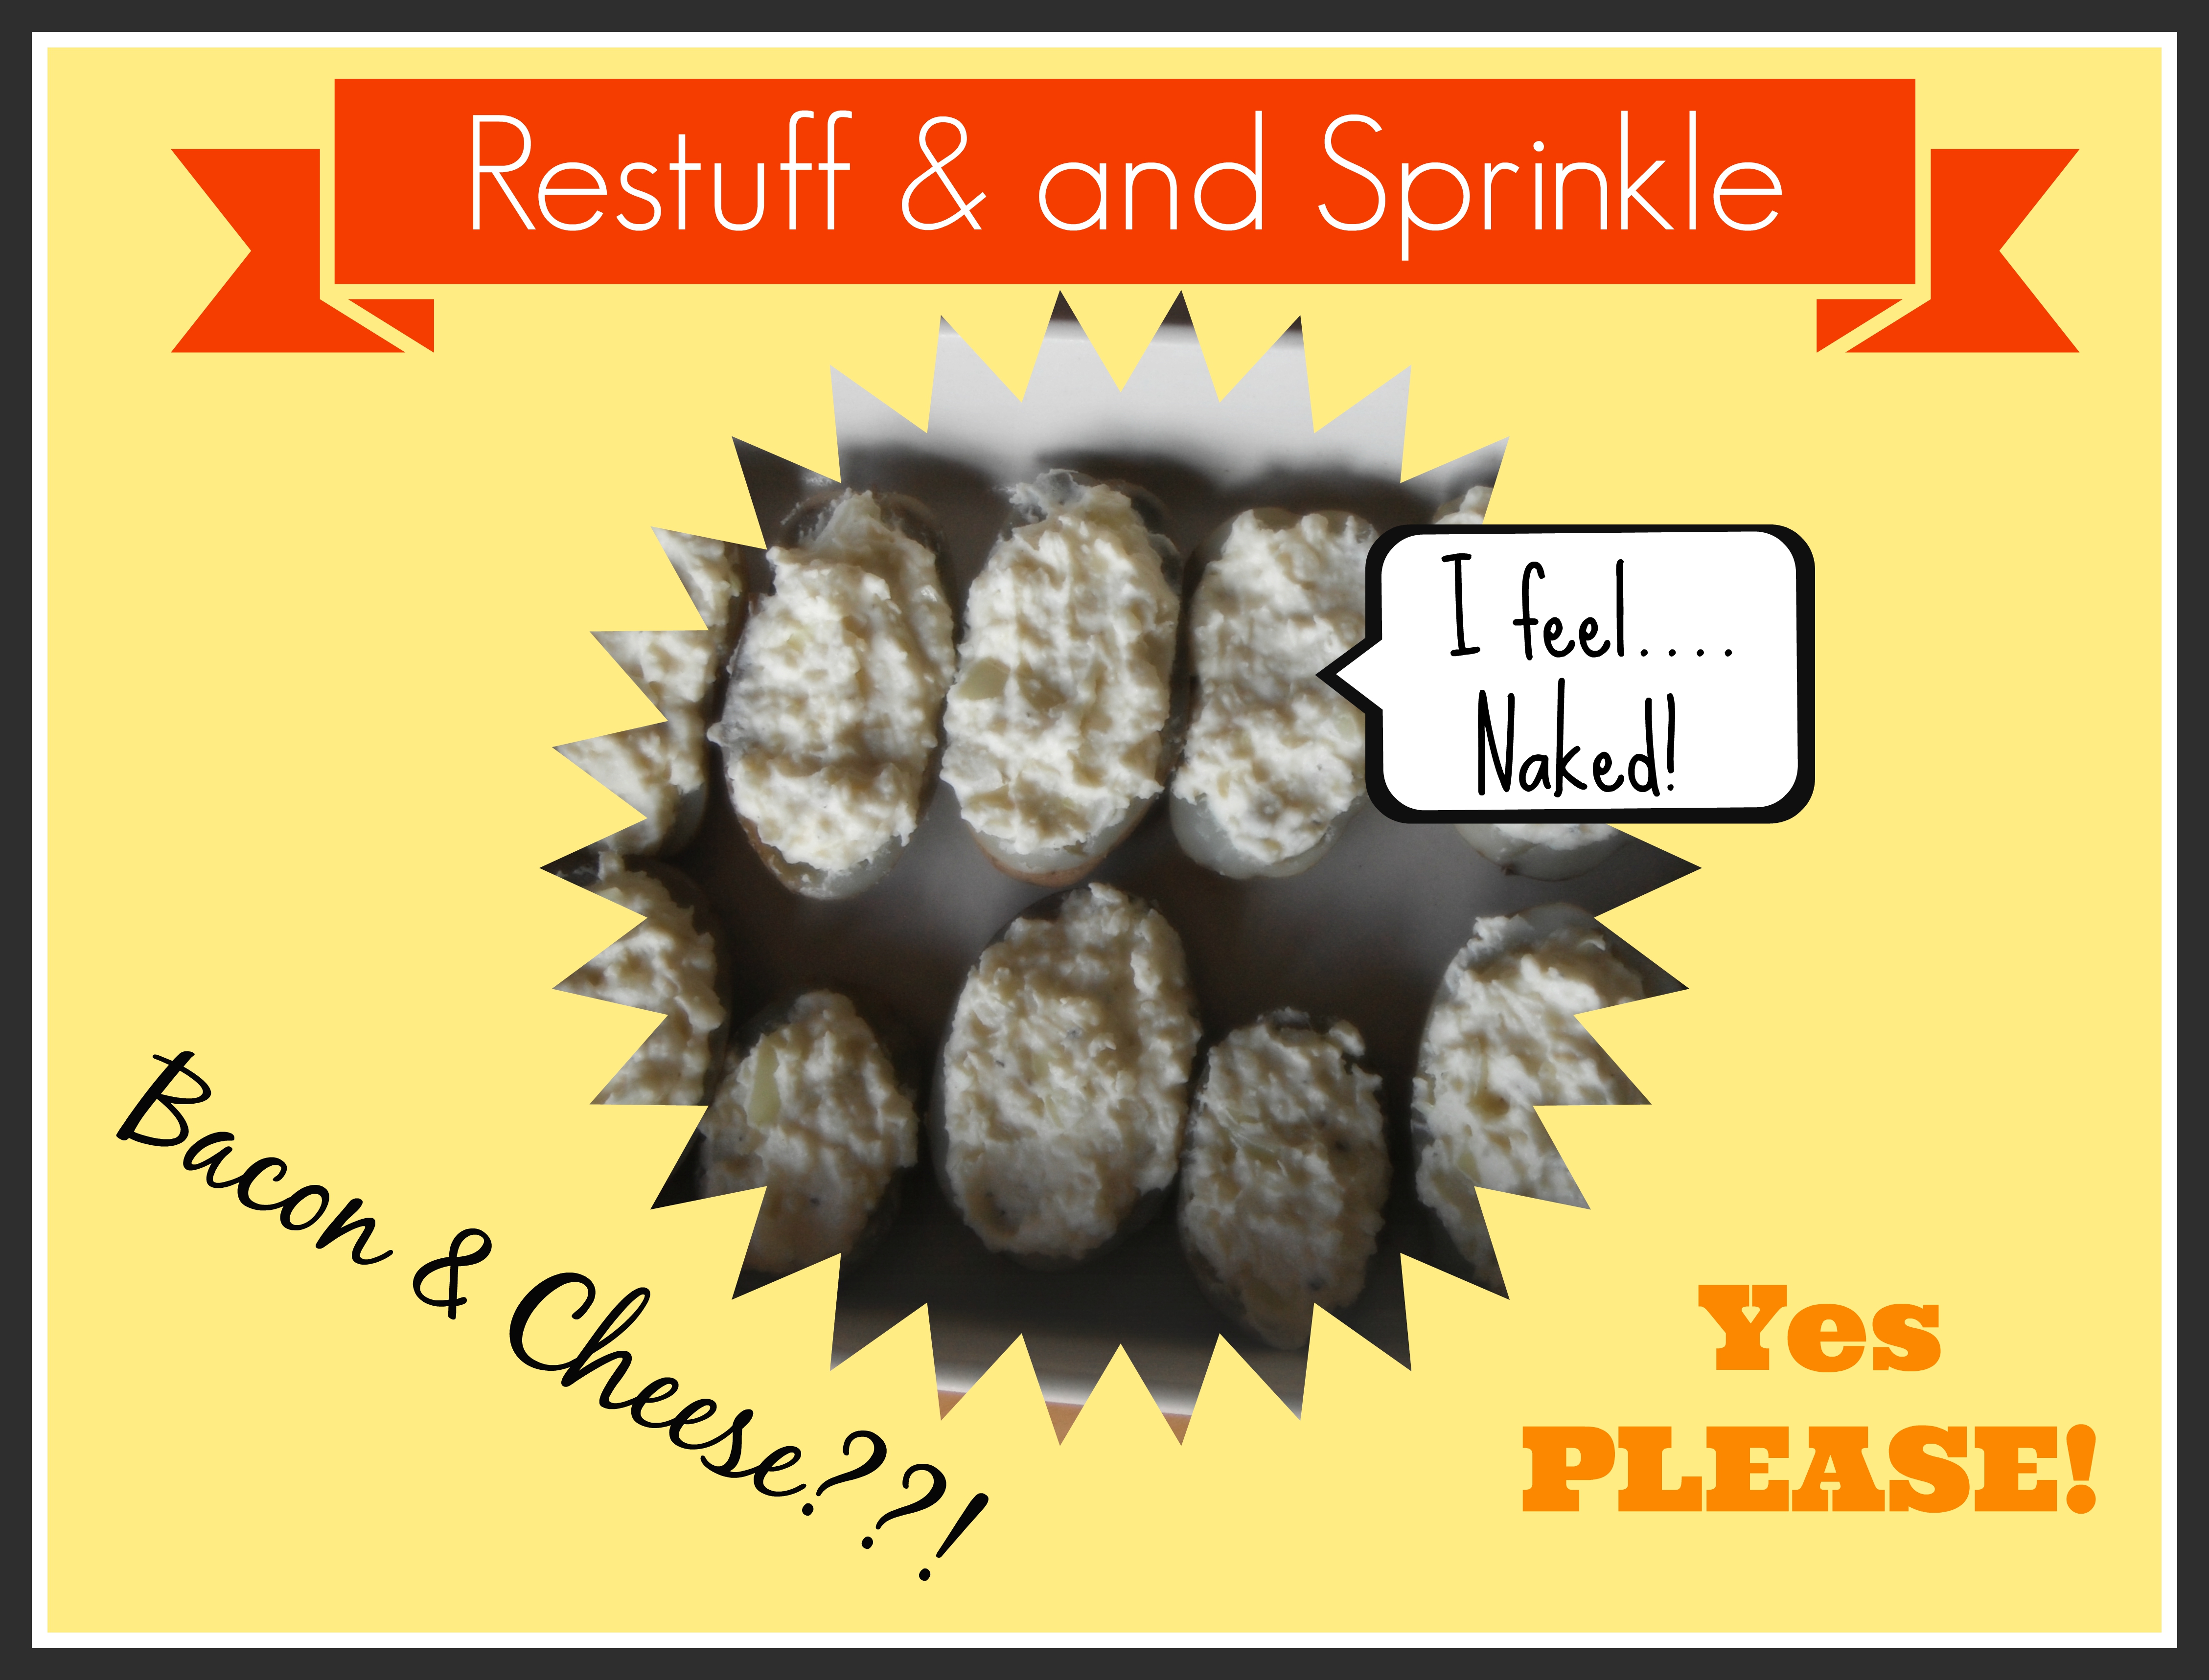
Step Four: Set aside 1 cup of cheese and 1/2 of the bacon. Mix and mash — (or SMASH!), all of the other ingredients into the bowl, (except for the chives).

Step Five: Spoon the mashed potato mixture back into the potato skins and place them back on to the cookie sheet. Next sprinkle the remaining cheese and bacon on top.

Tip: I like to pre-mix the bacon and cheese in a separate bowl before sprinkling it onto the potatoes. This helps to ensure and even-distribution to each potato!

Step Six: Place the potatoes back into the oven bake for about 20 minutes at 350 degrees Fahrenheit, or until the cheese is melted on top.

Step Seven: Sprinkle fresh chives on top, serve with sour cream, and enjoy!

4

De-Leaf a Cabbage – The Proper Way & The Easy Way!

Ahhh, the secret to de-leafing the fabled cabbage! Sounds scary, but really isn’t! 😉Feature Image
What you’ll need:
– A chopping knife
– A cabbage-sized pot
– 2 forks
– Water
– A cabbage (But, of course!)
Step 1: Chop off the bottom of the cabbage, and try to de-core a little ways in, (kind of like de-coring just the bottom part of an apple).
Step 2: Put the cabbage into the pot, bottom down, and fill with water. Boil for at least 5 minutes.
Step 3: Remove the pot from heat until the water stops boiling and very carefully use the two forks to roll the cabbage so it is bottom-up… yes, bottom’s up!! 😉
Step 4: Use one fork to hold the cabbage in place, and use the second fork to peel the leaves off, one leaf at a time. Only peel leaves that come off easy…. If your leaves aren’t peeling easy, than you need to boil your cabbage for a little longer.
Tip: I can usually peel 4 leaves at a time, and then I stuff them. While I am stuffing the first 4 leaves, the other leaves are having time to soften up in the water…. So try to make sure that you constantly keep your water just under a boil!
Try these Easy, Cheesy, Cabbage Rolls! – Made with Red Cabbage!

Easy, Cheesy, Cabbage Rolls! – Made with Red Cabbage

Feature Image
Mmm……. Try this yummy family sized dinner! (8-10 rolls!) It’s so easy, savoury and delicious, you’ll want to eat another one…. and another one! Trust me — I just ate 4! (Ooops!!!)
What you’ll need:
– 2 cups of rice (I like to use wild long grain mixed with regular)
– 1 package of hamburger
– 1 medium onion (diced)
– 1 package of mushrooms (chopped)
– 2 packets of chicken bullion
– 2 tblsp of Worcestershire sauce
– 4 dashes of hot sauce
– 1/2 tsp of thyme
– 1/4 tsp of salt
– 1/4 tsp of pepper
– 1 can of tomatoes (diced)
– 1 can of tomato soup
– 2 cups of old cheddar cheese (shredded)
– 1 red cabbage (green works just as well!)
Step 1: In a super-big frying pan, add mushrooms, onions, hamburger, Worcestershire sauce, hot sauce, thyme, salt and pepper. Fry on medium heat.
Step 2: Prepare rice in a separate pot.
Step 3: Once both are ready, combine the rice  into the hamburger mixture. Then add the bullion cubes, 3/4 of the chopped tomatoes, and 1/4 of the can of tomato soup. Stir and simmer on low.
Step 4: Boil and peel cabbage.
Step 5: Put about 1/2 cup of the rice mixture onto 1 cabbage leaf, sprinkle with cheese, and roll. Repeat for about 9 more rolls, placing each roll into a rectangular, oven-safe baking dish. 
Step 6: Combine the remaining diced tomatoes and tomato soup in a separate bowl, and then pour over the cabbage rolls. Sprinkle the remaining cheese on top, and cover with foil.
Step 7: Bake in the oven for 1 hour at 350 degrees Fahrenheit.
Serving Tip! – If I have any remaining rice leftover,  I will make a bed of rice on the plate to lay my cabbage roll on. I then add a dollop of sour cream, and chives to garnish… (Sooooo YUMMY!!!!)
 Check out The Proper Way & Easy Way to De-Leaf a Cabbage!


BBQ Honey Garlic Sauce – So EASY! So YUMMY!

This homemade BBQ Honey Garlic Sauce is not only sooooo easy, but it is sooo yummy too! You can use it on anything… Stir Fry, Chicken Wings, BBQ’d Pork, etc… The best part is, you only need 5 ingredients — And it will be ready in minutes!!! 😉
Five IngredientsWhat you’ll need:
– 1/2 cup of Honey
– 1/4 cup of BBQ Sauce
– 1/4 cup of Soya Sauce
– 1 Tbsp of Mustard
– 1 Tsp of Garlic (crushed or chopped)
SimmerMix all of the ingredients into a sauce pan over medium heat, and bring to a boil. Then turn the heat to low and let it Simmer, SIMMER! for 5 to 10 minutes.
Feature ImageAdd to your favorite dish and serve! Mmm…. DELISH!! 🙂 

Cinnamon Vanilla Milk Bath

4Did you know that milk baths have been used throughout history by women all over the world? Strong powerful women, such as Cleopatra, Elizabeth the First and Elisabeth of Bavaria. Back then milk baths were only for the rich and powerful, but guess what, times have changed, and I’m pretty sure that if you were to go look in your fridge, right now — you would find milk!

This luxurious, sweet smelling, three-ingredient milk bath will leave your mind & body feeling calm and soothed, and leave your skin feeling fresh and silky-smooth! It also works great for providing relief to skin pain or itch caused by sunburn, bug bites, and even poison ivy.

The best part about it, is that you can easily whip up this cinnamon vanilla milk bath in less than 5 minutes, using ingredients that almost any family household is guaranteed to have in stock!

All you need is:

  • 2 cups of Milk
  • 1 tbsp of Vanilla Extract
  • 2 tsp of Cinnamon

Step One: Add all ingredients into your mason jar.

Step Two: Fasten lid tightly, and shake, shake, shake!

Step Three: Add to your bath water.

Step Four: Enjoy!

Tip: Try substituting the milk for 10% or 18% cream for an extra creamy and luxurious bath!