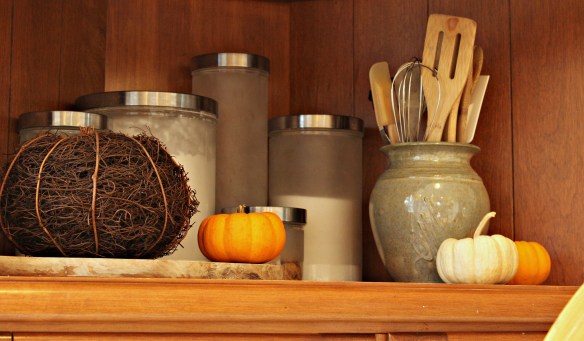
A little fall here, a little fall there, 2016 Fall Home Tour!

000Welcome to my home! This is actually the Project Pile’s very first fall home tour — ever! Fall is my favorite season decorating-wise, (and winter is, snowmobiling-wise!)… So I’m very excited to share this post with you!

Let’s start outside!

12

This is the front yard… not a whole lot going on out here yet, but I still love the view! The soy-a-beans are just about ready, and as soon as this rain clears up, I expect that the farmer will be out and ready to harvest them… My little girl Lacee, just loves tractors and combines, and will sit on the front porch and watch once the time comes. (Please ignore the un-mowed grass in this pic! We’ll just blame that on the rain, for now!)

13

This is the backyard, and as you can see, the leaves are just starting to turn… Maybe another week and they will be all ready?! Then we can rake and jump in them!

15

And here is my actual home… Come on in!

00000000

This year, I decided to decorate my front porch with some of my old antique pieces that I have been collecting over the years…

6

Here is my antique wagon wheel, and a few of my antique bottles that have been collected on my family’s 180-year old farm, over the years.

4

And here is my antique milk-can, also from the farm, and an antique ladder, from that area.

3

You can check out my full front porch décor here: A Rustic Fall Front Porch, using Some of my Favorite Antique Pieces!

12

From the front porch, let’s enter into the dining room! Just a little fall décor in here, so far. I still have to do my table-setting, but being the master-procrastinator that I am, probably won’t get it finished till the night before Thanksgiving! I just did a little decorating on the buffet in this room…

4

A few pine cones and flowers here…

3

A few hand-painted and real pumpkins there!

[Psst! You can learn how to hand-paint your own pumpkins here: How To Transform Dollar Store Pumpkins!]

10

You can see my full buffet décor, and learn how I put this look together, here: A Quick & Easy Fall Buffet Makeover!

3

Now let’s mosey on down to the living room! Sorry, the lighting is a little more than off, in here… I love my big, beautiful front porch, but it really seems to hamper the photo-taking quality in this room… Oh well, what can you do?!

11On the way down, we pass my antique barn windows that were used as the seating plan for wedding…

10

All I did here, was switch out my regular white rose garland for some leafy-red sunflowers, and then hung a very simple wreath in the middle. Very colorful, and yet a really, really, simple update for fall!

2

These are my chickens! I actually stole these from my mother! I love them so much, they stay out all year, no matter the season. All I did here to dress them up for fall, was switch out the flowers in my faux flower box for some fall colored ones.

4

I did the same thing for this side-table… just added some more rusty-colored flowers for fall, plus my deer head!

1

Oh, and a few cutesy, little pumpkins too!

14

Oh… and just in case you wanted to see what the other half of my living room looks like, (the half that I always try to hide from you), here it is… Toy City, over here! LOL

6

Let’s head to the kitchen now!

8

Again, just some very simple fall season updates in here!

7

Pretty, mini pumpkins here…

9

Plus a few wicker pumpkins there!    

5

Oh – and let’s not forget my 2 second kitchen table centerpiece! All I did here, was take the leaves off of an old fall garland that I had kicking around, and stuff them into this transparent vase… Doesn’t get much easier than that!

OK… are you ready for my fall bedroom décor?!

Just kidding! I really wanted that to happen, but let’s face it… I’m just not that good! 😉

I really hope you enjoyed this “a little fall here, a little fall there,” 2016 Home Tour! Thanks for stopping by the Project Pile!

A Quick & Easy Fall Buffet Makeover!

00This year I could not wait to start decorating for fall! And even though it’s still a little early, I just don’t care – I’m going for it!I actually started stock-piling up my fall decor in early August…. but I am just starting to organize and put it out now…. Sad in more ways than one, yes I know! 😉10

My first task of every season is always to start out by decorating my favorite antique dining room hutch – or the “Buffet”, as I like to call it.This buffet was in my parents dining room for the whole time that I was growing up in their 180-year-old farmhouse, and then was eventually banished to live in the barn for a few years. 11

Since I have always been super in love with this beautiful piece, I decided to bring it home and give it a makeover. (You can check out the entire process, including before and after photos of the makeover, here!)12

Now…. Back to decorating!

Step One: Clear off entire buffet.

Step Two: Add a pretty runner.

Step Three: Ignore the dirty mirror… for now!1

I always, always find that the best way to start decorating, is to start with a clean slate!2

After creating the perfect blank slate, the next step that I like to take, is adding my larger “background” décor pieces. And…. What I start out with is not always what I end up with, as you’ll soon see!Like my pretty runner?! I found this little guy in a super cute antique shop in Campbellford, Ontario…. I actually picked up two of them, so I have a matching one for my dining room table. Hopefully I’ll get to my fall table setting sometime soon! (If you are looking for ideas for the perfect fall table setting, check out my post on How To Create The Perfect Table Setting!)

3

Again… ignore the dirty mirror – we’ll fix that guy later! 😉

Next I start dressing up my larger pieces, by adding accents and playing around with the details.4

I actually used all Dollar Store stuff to dress up this piece! Dollar Store, pinecones, flowers, and the leaves off of the flowers. I just jumbled them altogether in the baskets until I was happy with them!5

I even got the pretty fake gourds and pumpkins from the Dollar Store!1

I just dressed them up a little…. (How To Transform Dollar Store Pumpkins!)2

Once I was happy with the above piece, I started sticking in other pieces of my fall décor, and switching things out, just to see what I liked the best! As you can see below, I ended up switching out the clock for my most favorite vase ever…. A decorative tin vase that I purchased at an annual flea market for a whole five dollars!6

After I decided to use my favorite vase, I then had to find something to put in it…. It took me a few minutes to come up with the perfect thing that I have been waiting to use for a long time now!15

You see, I have this crazy monster-tree in my front flowerbed! It was only supposed to grow to 4 feet, but it’s more like 10 feet, since the pieces on the top grow straight up. The last time that I trimmed it, I thought hmm…. I’m going to utilize this monster-tree and make it work!9

The final steps for decorating my beautiful buffet for fall, were to add pumpkins, and a few pops of color! I know that neutral whites are really in this year, but I just had to add the bright orange pumpkins…. And I do love how they look!8

I also added in my lovely antique insulators…. Three of my favorite pieces!9And that’s basically it! Recap! Start with a blank slate, add a pretty runner for a backdrop…. Add in some larger background pieces, some accents, some favorite pieces, and a pop of color!

Hutch Make-Over with Chalk Paint!

Pinterest

If you caught last week’s post, you’ll remember that I was super-excited, because I finally tried Chalk Paint! And you know what…. I’m still super-excited about it! Woo-hoo!!!

So, without any further a due, I now present to you, my beautiful Hutch Make-Over!

5

I love, love, love this piece! I always have…. growing up as a little girl in my parents 180+ year old farm house, it was always a main feature piece in their beautiful dining room. As my parent’s decor-taste changed, as people’s often does, this gorgeous piece was moved out into the barn for storage, where it has probably sat for roughly ten years.

I was so excited to bring this hutch home and start working on it! Needless to say, it was in a little bit of rough shape…. I reinforced the piece using staples and finishing nails, and used wood filler to fill in any cracks. I then started sanding. One front foot was missing a piece, so to make them match, I took my trusty old hammer and tapped off the identical piece on the other front foot. I then sanded them down to round out the edges and make them match. This turned out to be such an easy solution to my major dilemma!

I then sanded down the top of the hutch, and the two front legs. The reason for doing this comes from that age old question — “To paint, or not to paint?”…. So I always try to compromise with myself and do a little of both! 😉

Since I was going to use chalk paint to paint the rest of my hutch, all that I needed to do was sand down any of the previous finish that was flaking. I then chalk painted the body of the hutch. It only took two coats with this amazing chalk paint! If you like, check out some of the reasons of why I decided to use chalk paint, and why I completely love chalk paint!

To finish the top and front legs of the hutch, I decided to use the dark wax that can be used to create a different finish with the chalk paint. I would normally use a stain here, but wanted to try this out instead. And the result? Amazing! I completely love how it turned out!

Ok, and here is the finished product! LOVE IT!4

Tip: I used this fantastic trick from the CreekLineHouse.com to get my mirror sparkly-clean! – 10 Almost Life-Changing Uses for Rubbing Alcohol

8

Chalk Paint – Tried & Tested (I finally did it!)

2

So, I did it! I finally broke down and bought some of Annie Sloan’s Chalk Paint… So what did I think? Would I do it again? And most importantly, would I recommend it?

When it comes to crafting & DIY-ing, one of my main goals is to cut costs wherever possible, and painting furniture was definitely one of those items always up on the chopping block… Why would I buy special paint when I could just go out to my trusty garage and mix up some kind of creative concoction to get the job done? Well, chalk paint has been all of the rave lately, and I have a couple of friends who swear by it, so I finally decided to throw in the towel and try it!

And — dun, dun, dun… the results are in! I love, love, love it! And here are the reasons why:

  1. First of all, the color selection is amazing! They have a large variety of main colors to chose from, and then by mixing these you can easily create a whole new set of colors!
  2. It only took me two coats of paint for sufficient coverage. Yes — I said, TWO COATS!
  3. The piece that I painted was about 14 square feet, and I only used about 1.5 inches of paint out of the can! This fact significantly reduces the price-point of chalk paint. You will be able to paint A LOT of pieces from just one can!
  4. Chalk Paint can be used on a large variety of surfaces, ranging from wood and metal all of the way to plastic and fabric!
  5. NO PRIMING or SANDING required! Just another great benefit… (Just remember to use a little common sense with this one… Do not paint over peeling or flaking paint. Just give it a real quick sanding or wire-brushing first!)
  6. There are several different finishes that can be easily achieved with chalk paint. (Chippy-Rustic Look, Smooth Modern Finish, Two-Color Distressing and the Simple Vintage Look!)
  7. Chalk paint  has two different waxes to choose from to finish off your masterpiece, a clear wax or a dark wax… another super-feature of chalk paint — getting so many completely different looks out of the same can of paint!
  8. This wonderful product can also be used as an interior or exterior paint!
  9. I was able to use the dark wax instead of a stain to accentuate the grain in my unpainted wood — So easy!

So, in summary, if you have been contemplating Annie Sloan’s Chalk Paint — I say… GO FOR IT! You will LOVE it! 🙂