DIY Feather Boa Garland

10

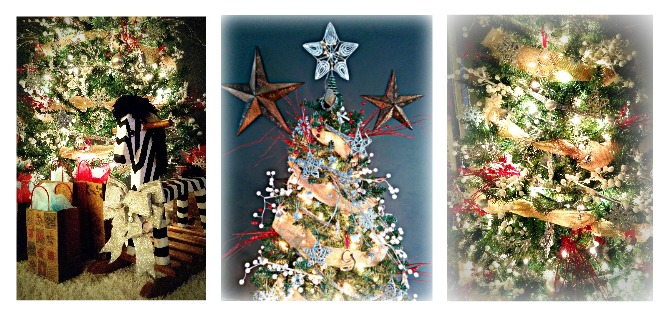
Last year during the end-of-the-season Christmas sales I happened upon this beautiful white feather Christmas tree… Even though Christmas was over, I decided to purchase it and save it for next year. So when Christmas rolled around this year, I was so excited for it! And I actually decided to use it as the inspiration piece for the rest of my Christmas décor… Light, white and airy!

01

I started thinking about how I would incorporate the tree into my décor and think about what other elements would go nicely with it. It hit me at about 2am in the morning… I woke up, and thought feather boa garland!

02

And where is the best place to get white feather boas from? Why, the dollar store – of course!

03

(Notice that there aren’t any white boas in this pic… that’s because I already bought them all!)

And that’s how my white feather boa idea was born!

The next day I headed out to the dollar store, and purchased 8 white feather boas. I brought them home and was so excited to add them to my tree!

All I did was add them to my tree…

04

And then tie the ends together! Yes – it was that simple!

05

I found that it was actually easier to add them to the tree before tying them together. Then I fluffed up the feathers to hide the knots.

06

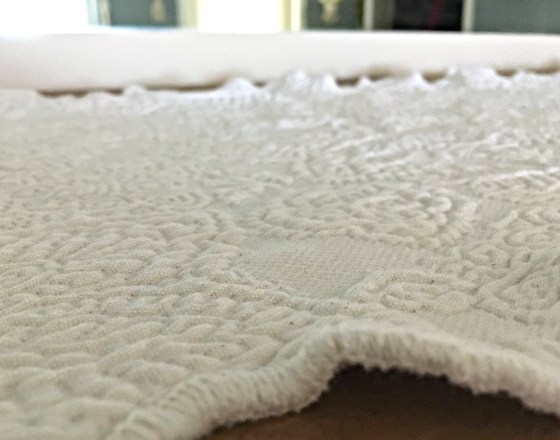
I really love how this DIY garland worked out… It certainly is light, white and airy! When the lights are turned on it kind of looks like a nice fresh snow has just fallen onto my Christmas tree!

08

Next year, I’m thinking of doing the same thing, only maybe trying a different color… like black, or red, or even purple! (Psst! Do you like my tree? Check out why I decided to spend a little more money on my Christmas Décor, this year!)

07

Just to summarize, I ended up using 8 boas on my seven and a half-foot tree, although next year I would probably add a couple more to the total… So if you try this yourself, just keep the size of your tree in mind!

Merry Christmas & Happy Decorating!

How to make your own Monogrammed Twine Letter for Less than $2!

15I’ve always wanted a monogrammed letter for my home… the letter ‘G’, to be exact, for our last name, Griffore! For years and years, I have been looking every time I hit up a Michaels or Winners… but every time that I found one that I really liked, it was just a little bit more money than I wanted to spend on a single letter. Especially when I kept thinking how easy it would be to make one…

14

Finally the other night, the perfect opportunity to make my very own monogrammed ‘G’ presented itself! Baby Gri-Gri #2, is due to arrive any day now, and we are so excited! So excited, that we decided to purchase a brand new crib for her! Now, purchasing a crib is one thing… putting it together is completely another! However, while my husband was busy putting it together, I couldn’t help but notice all of the beautiful pieces of Styrofoam packaging, that was just begging to be made into something!

1Our crazy little helper!

The first thing that I had do was steal the perfect piece of Styrofoam from our crazy little helper, before she completely destroyed it all!

2

Next I opened up ‘Microsoft Word on my trusty old lap top, and started flipping through different fonts until I found a ‘G’ that I liked to use as a guide. Now if you were really smart, you could just print your ‘G’ out, cut it out, and trace it onto your Styrofoam! However, my printer has been out of ink since the last school year ended, and I can never-ever remember to buy some more – or even remember to put it on my shopping list… So sad, I know! 🙁

7

Due to our major shortage of printer ink, my crazy little helper and I, had to get a little more creative! We ended up using a marker and a small Styrofoam plate to trace around. We then connected the top part of the ‘G’ to the bottom part, and used a straight edge to finish it up.

9

The Styrofoam was a little bit tricky to cut, and I found that a paring knife worked best. I kind of used the same technique that I use to carve my pumpkins… push it straight in, and pull it straight out!

10

After I finished cutting out my letter, it was time to make it pretty! I decided to use twine from the dollar store. It only took me one full roll of twine, plus about a quarter of a roll… so really, less than two-dollars’ worth!

11

All I did was use a hot glue gun to tack on my twine as I wrapped it, here and there, to help keep the twine in place.

12

And then, I just kept wrapping, and wrapping, and – wrapping! After my ‘G’ was completely covered in twine, I went back over any “skinny” looking areas, to thicken them up, to keep the overall shape of my letter consistent.

13

Ta-da! Here it is! Not too shabby, right?! I mean it’s not perfect, but that’s ok… it’s just very rustic looking! And I mean, like it only cost two dollars! You totally can’t beat that!

14


It turned out just perfect for my Ten-Minute, Two-Dollar Wreath!  

So go ahead, give it a try! And remember, you don’t have to just use twine… try burlap, or your favorite ribbon! Post your pics in the comments below, as I would love to see them! 🙂

A Quick & Easy Fall Buffet Makeover!

00This year I could not wait to start decorating for fall! And even though it’s still a little early, I just don’t care – I’m going for it!I actually started stock-piling up my fall decor in early August…. but I am just starting to organize and put it out now…. Sad in more ways than one, yes I know! 😉10

My first task of every season is always to start out by decorating my favorite antique dining room hutch – or the “Buffet”, as I like to call it.This buffet was in my parents dining room for the whole time that I was growing up in their 180-year-old farmhouse, and then was eventually banished to live in the barn for a few years. 11

Since I have always been super in love with this beautiful piece, I decided to bring it home and give it a makeover. (You can check out the entire process, including before and after photos of the makeover, here!)12

Now…. Back to decorating!

Step One: Clear off entire buffet.

Step Two: Add a pretty runner.

Step Three: Ignore the dirty mirror… for now!1

I always, always find that the best way to start decorating, is to start with a clean slate!2

After creating the perfect blank slate, the next step that I like to take, is adding my larger “background” décor pieces. And…. What I start out with is not always what I end up with, as you’ll soon see!Like my pretty runner?! I found this little guy in a super cute antique shop in Campbellford, Ontario…. I actually picked up two of them, so I have a matching one for my dining room table. Hopefully I’ll get to my fall table setting sometime soon! (If you are looking for ideas for the perfect fall table setting, check out my post on How To Create The Perfect Table Setting!)

3

Again… ignore the dirty mirror – we’ll fix that guy later! 😉

Next I start dressing up my larger pieces, by adding accents and playing around with the details.4

I actually used all Dollar Store stuff to dress up this piece! Dollar Store, pinecones, flowers, and the leaves off of the flowers. I just jumbled them altogether in the baskets until I was happy with them!5

I even got the pretty fake gourds and pumpkins from the Dollar Store!1

I just dressed them up a little…. (How To Transform Dollar Store Pumpkins!)2

Once I was happy with the above piece, I started sticking in other pieces of my fall décor, and switching things out, just to see what I liked the best! As you can see below, I ended up switching out the clock for my most favorite vase ever…. A decorative tin vase that I purchased at an annual flea market for a whole five dollars!6

After I decided to use my favorite vase, I then had to find something to put in it…. It took me a few minutes to come up with the perfect thing that I have been waiting to use for a long time now!15

You see, I have this crazy monster-tree in my front flowerbed! It was only supposed to grow to 4 feet, but it’s more like 10 feet, since the pieces on the top grow straight up. The last time that I trimmed it, I thought hmm…. I’m going to utilize this monster-tree and make it work!9

The final steps for decorating my beautiful buffet for fall, were to add pumpkins, and a few pops of color! I know that neutral whites are really in this year, but I just had to add the bright orange pumpkins…. And I do love how they look!8

I also added in my lovely antique insulators…. Three of my favorite pieces!9And that’s basically it! Recap! Start with a blank slate, add a pretty runner for a backdrop…. Add in some larger background pieces, some accents, some favorite pieces, and a pop of color!

How To Transform Dollar Store Pumpkins!

How To Transform Dollar Store Pumpkins!

You know those super-ugly pumpkins and gourds that you can get from the dollar store?!

How To Transform Dollar Store Pumpkins!

OK, well maybe they aren’t that ugly…. Perhaps they just aren’t quite the right colors for your home décor? Well, guess what! You can transform those dollar store pumpkins into something beautiful that will work perfect for you!

How To Transform Dollar Store Pumpkins!

It’s really way easier than you are probably thinking, too! I used chalk paint and acrylic paint, but really any type of paint that you have on hand will do!

Umm…. Step one – Ditch the toddler!!!! Just kidding! (Maybe!)

How To Transform Dollar Store Pumpkins!Ok, step one for real now! The first thing that you want to do is mix up your base coat. I had some white chalk paint on hand, so I just simply added some dark green acrylic paint to it, until I created a color that I was happy with. Kind of like a mossy-mint green, I guess?! Next I applied this base coat to all of my ugly dollar store pumpkins. I actually applied two coats of paint for my base coat. This may vary depending on what type of paint you are using…. Just keep applying paint until you have full coverage!

How To Transform Dollar Store Pumpkins!

Looking pretty good, right?! Definitely much better than before, but I still wanted to add a little more detail, so they looked just a little more realistic. Now you may think this is the tricky part, but really it’s quite simple, so don’t panic!

(Hey! Looking for more great pumpkin decor ideas? Check out White Painted Pumpkins and Milk Glass!)

How To Transform Dollar Store Pumpkins!


I just picked out the accent colors that I wanted to add to my mossy-mint pumpkins, and put a dab of each color onto my pallet – uh, I mean mason jar lid! I then dabbed a little of each color onto my paint brush. The secret to get everything blended so well is to keep using the same paint brush for all of the colors, without rinsing in between.

How To Transform Dollar Store Pumpkins!

I then started applying the accent colors inside the grooves of my pumpkins. Then I went back to each groove and “brushed it out” across the rest of the pumpkin, using vertical strokes only!

How To Transform Dollar Store Pumpkins!

I just kept repeating this process for all of my pumpkins…. Playing with the accent colors until I was happy with them. I then went back and repainted my stems. Being the sloppy painter that I am, any extra paint that I got onto my pumpkins, I just “brushed it out”, and blended it in!

How To Transform Dollar Store Pumpkins!

I then let my pumpkins dry.

How To Transform Dollar Store Pumpkins!

And added them to my décor….

How To Transform Dollar Store Pumpkins!

And I really couldn’t be happier with how they turned out!

How To Transform Dollar Store Pumpkins!

Umm, are those fake or real?!

How To Transform Dollar Store Pumpkins!


So go ahead and give it a try! Remember, if I can do it, you can do it! 😉

[Psst! Check out: The Very Best Tips for Cleaning Paint Brushes Quickly and Easily, from the creeklinehouse.com!)


HERE ARE SOME MORE POSTS TO ENJOY!

Faux Pumpkins for Early-Fall Lovers! (Like Me!)

Mason Jar Pumpkin Candle Holders

A Quick & Easy Fall Buffet Makeover!

Get This Burlap Printable Set for Fall, for Free!

A little fall here, a little fall there, 2016 Fall Home Tour!


How To Transform Dollar Store Pumpkins!


*This post may contain affiliate links.

Easter Bunnies — Dollar-Cheap to Super-Chic!

4

Easter bunnies! Dollar store Easter bunnies! Ok, so the little Easter bunnies that I picked up from the dollar store are so, so, so cute…. however, their cute little pink ears, and their cute beady little eyes just weren’t one-hundred percent meshing with the rest of my Easter decor…. I was looking for something with the same cuteness level, but slightly more neutral. (Yes — even more neutral than an already white Easter bunny…. silly, I know!)

Lately I have been on a “White-Ochre” chalk-painting spree…. I’ve recently painted my antique-tin-ceiling wall-art, my serving tray, my buffet, and even my giant spoon and my giant fork! So I thought — why not?6

It took two coats of chalk-paint to get the perfect look. The already-white surface covered super-easy, but the eyes and ears took a couple of super-thick coats. And just an FYI, when painting on this type of material, you have to wait for the paint to completely dry in between coats, or else it won’t stick properly.

I originally saw this idea over at The Creek Line House! Only instead of using chalk paint, she used this really neat “Mirror Effect” spray paint…. and wow — did those bunnies turn out amazing! (Check it out here!)

So basically, you can update your dollar store bunnies with whatever paint you have on hand, and you can use any color you like too! It’s such an easy, simple and cute way to customize your very own home decor!

I personally think that these cute little bunnies turned out amazing! I couldn’t be more happy with them, and I can’t wait for you to see them incorporated with all of my other Easter decor…. but, we’ll save that for another day…. So make sure you stop back by The Project Pile to check it out!


HERE ARE MORE DIY IDEAS TO TRY!

An “easy as pie” DIY Rag Wreath for Spring!

DIY Barnboard Bunny Family Art Deco

Easy, Breezy, Beautiful Easter Décor! (All you really need are a few good pieces!)

DIY Distressed Pillar Candle Holders

Hutch Make-Over with Chalk Paint!


*This post may contain affiliate links.*

Home Office & Command Center Organization (tricks from the dollar store!)

Since my latest and most exciting career change of becoming a college instructor, I must admit…. our home office has become a little — actually, a LOT, out of control! My poor husband…. I pretty much took over his desk, his computer, and his home office has now been re-titled as “our” home office.3

As you can clearly see, I had to do something…. especially before the next semester started. It was a little difficult to figure out where to start with this home office project, so of course I decided to start it with a little bit of shopping! My budget for this project was extremely low…. (like $20 low!)

So I headed to one of my favorite stores ever, The Dollar Store! Instead of starting in the more traditional “office supply” aisle, I started out in the “kitchen” aisle, and boy, did I hit the jackpot!

4

See that super cute fruit basket?! Well guess what… now it’s an office supply basket! It was just so pretty, I had to have it!

5

See this super chic napkin holder?! Well now it’s a letter/mail holder! A little bit brilliant, if I do say so, myself…. 😉

7

My new pen/pencil holder is actually a kitchen utensil holder…. I chose it over a typical stationary holder because it is much larger, and it hides everything…. so much prettier!

8

See this cute little cube wire rack organizer? Dollar Store! And the same with these cute little floral print baskets…. perfect for hiding those messy file folders and great for extra storage too!9

This cute little 3 drawer organizer also came from The Dollar Store! Its perfect for hiding my paper clips, USB sticks, and any other super tiny “office-junk”.

href=”https://theprojectpile.com/wp-content/uploads/2016/01/10.jpg” rel=”attachment wp-att-577″>10

I also found this 5 hook hanger at….. The Dollar Store! And its chrome — it totally matches the rest of my new organizational items!11

This giant calendar is definitely an organizational must-have! Although, I did accidentally by the French version (oops!)…. I guess it never hurts to learn something new! 🙂

1

So here is my cozy command center/home office that I was able to carve out of a corner of “our” home office…. Not too shabby! Even though I had to wheel out the kegerator and wine chiller, I’m sure my husband will be so happy to have his desk back! 😉


My Dollar Store Christmas Tree! Wait….. What??!

8
This year I decided that I was going to make all of the decorations for my Christmas tree — yes, make…. and well, how did that go, you ask…. HA!

So umm…. scratch that!

Welcome to my new post…. about how to decorate your Christmas tree with Dollar Store decorations! Yes, it is possible…. and yes — I am SO in love with the results!

Before I get to far into my post, I would like to point out that my inspiration for this tree, my burlap garland, did not come from the dollar store…. but it was the perfect foundation for me to build my dollar store decorations upon!

The colors that I selected to go with my burlap garland were 1. Silver, 2. White, and 3. Red. The reason why I chose these colors is because I knew that they would be easy to find… plus they are just like, so pretty!

I was able to find the cutest (and sparkly-est!) Silver ornaments at the dollar store…. pine-cones, sparkly stars, snowflakes, angels, bells, and my star-tree-topper, (also sparkly!). Then I found glittery, wispy fake-flower-thingies that came in both silver and red! To add white into the mixture, I found these other snow-ball fake-flower-thingies…. perfect!

Now I must say, my tree does look a million times better in person…. but I still had to share. Maybe I’ll find that shiny new camera under the tree, Christmas morning?! (Hint, hint Matt!) 😉