Fast and Fabulous Fall Decor!

Fast and Fabulous Fall Decor!

This year I started out super ready for fall and hit the ground running! I started out with my Free Burlap Fall Printables, and my Burlap Rag Wreath, and thought wow — I am so ready, let’s do this!

Then… Life hit! Turns out that fall is actually, totally the most busiest time of the year for our family… Especially this year.

[Oh! Did I mention that some of my favorite bloggers and I throwing a teeny, tiny Fall Decor Link-Up Party?! Well, we are, and it’s amazing! Follow through the links below this post to check out their completely stunning fall home decor ideas!]

Continue reading

Faux Pumpkins for Early-Fall Lovers! (Like Me!)

Faux Pumpkins for Early-Fall Lovers! (Like Me!)

Do you love pumpkins and fall as much as I do??! Don’t get me wrong… I still love summer and don’t ever like to see it end, but my favorite is when those late August nights are right on the fine line where it’s not quite fall yet, but not quite summer any longer. These nights are the best!

Last night, Matt, the girls, and I went for a walk, and discovered that it’s finally that time of year again!

So today, to celebrate… I am putting together a list of some of the best faux decor pumpkins out there! There’s something for everyone! Whether you are into the white minimalist look, or soft greens, whites and neutral tones, or if you are into the more traditional, beautiful and rich, deep oranges, golds and reds! Continue reading

Last Minute Thanksgiving Vignette!

11

Even though our Canadian Thanksgiving has already come and gone, the American Thanksgiving is just around the corner… That’s why I thought that I would take the time to put together a very simple Thanksgiving Vignette to share with my American friends and family!

2

My mom recently gave me this really neat candle holder that is made to sit within a wine bottle. I decided that I wanted to try to build my vignette around this… And instead of using a wine bottle, I would use one of my antique bottles from my collection! (I love my bottles, and I get really excited when I get to use them!)

3

Next I decided that I would use this new serving tray that I just picked up last week. I found this beauty in the old train station in the little town of Stirling where I grew up. The trains and tracks are now long gone, but the old train station is still standing and over the last few years has been filled with beautiful antiques and collectibles, and is now one of my favorite little spots to hit up and see what I can add to The Project Pile!

This tray could be very old, or it could be vintage… I still have to do my research, but can’t wait to find out! I also still have to see if I can find a way to buff out the scratches, but we’ll save that for another day. Any suggestions?!

4

The next thing that I added to my tray were the cobs of corn. I snatched these little guys off of the stalks that I have out on the front porch, and haven’t had the heart to take down yet.

5

I also had some left-over mini pumpkins and gourds, so I added those to my vignette as well.

7a

I then played around with the placement of my antique bottles and the candle, until I came up with something that I liked.

8

I didn’t want to cover the entire tray, because I just love how pretty the patina is, but I still had a lot of bare space on the tray… that’s when I remembered my little supply of bittersweet that I had stocked up on earlier this fall. I just added a few sprigs here and there… and – voila! All finished!

1

It really took only about 10 minutes to throw together this Thanksgiving vignette, and I really, really like it! I hope you have enjoyed this post and feel inspired to create one of your own!

A Quick & Easy Fall Buffet Makeover!

00This year I could not wait to start decorating for fall! And even though it’s still a little early, I just don’t care – I’m going for it!I actually started stock-piling up my fall decor in early August…. but I am just starting to organize and put it out now…. Sad in more ways than one, yes I know! 😉10

My first task of every season is always to start out by decorating my favorite antique dining room hutch – or the “Buffet”, as I like to call it.This buffet was in my parents dining room for the whole time that I was growing up in their 180-year-old farmhouse, and then was eventually banished to live in the barn for a few years. 11

Since I have always been super in love with this beautiful piece, I decided to bring it home and give it a makeover. (You can check out the entire process, including before and after photos of the makeover, here!)12

Now…. Back to decorating!

Step One: Clear off entire buffet.

Step Two: Add a pretty runner.

Step Three: Ignore the dirty mirror… for now!1

I always, always find that the best way to start decorating, is to start with a clean slate!2

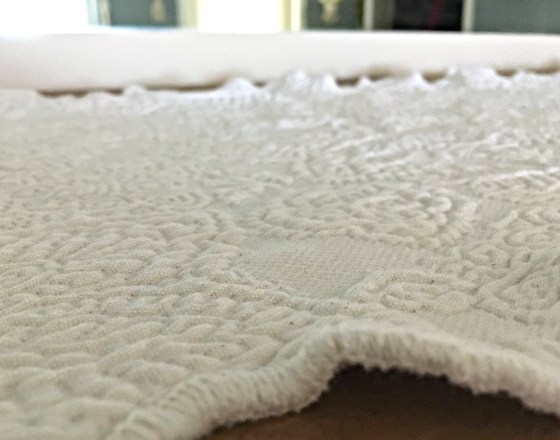
After creating the perfect blank slate, the next step that I like to take, is adding my larger “background” décor pieces. And…. What I start out with is not always what I end up with, as you’ll soon see!Like my pretty runner?! I found this little guy in a super cute antique shop in Campbellford, Ontario…. I actually picked up two of them, so I have a matching one for my dining room table. Hopefully I’ll get to my fall table setting sometime soon! (If you are looking for ideas for the perfect fall table setting, check out my post on How To Create The Perfect Table Setting!)

3

Again… ignore the dirty mirror – we’ll fix that guy later! 😉

Next I start dressing up my larger pieces, by adding accents and playing around with the details.4

I actually used all Dollar Store stuff to dress up this piece! Dollar Store, pinecones, flowers, and the leaves off of the flowers. I just jumbled them altogether in the baskets until I was happy with them!5

I even got the pretty fake gourds and pumpkins from the Dollar Store!1

I just dressed them up a little…. (How To Transform Dollar Store Pumpkins!)2

Once I was happy with the above piece, I started sticking in other pieces of my fall décor, and switching things out, just to see what I liked the best! As you can see below, I ended up switching out the clock for my most favorite vase ever…. A decorative tin vase that I purchased at an annual flea market for a whole five dollars!6

After I decided to use my favorite vase, I then had to find something to put in it…. It took me a few minutes to come up with the perfect thing that I have been waiting to use for a long time now!15

You see, I have this crazy monster-tree in my front flowerbed! It was only supposed to grow to 4 feet, but it’s more like 10 feet, since the pieces on the top grow straight up. The last time that I trimmed it, I thought hmm…. I’m going to utilize this monster-tree and make it work!9

The final steps for decorating my beautiful buffet for fall, were to add pumpkins, and a few pops of color! I know that neutral whites are really in this year, but I just had to add the bright orange pumpkins…. And I do love how they look!8

I also added in my lovely antique insulators…. Three of my favorite pieces!9And that’s basically it! Recap! Start with a blank slate, add a pretty runner for a backdrop…. Add in some larger background pieces, some accents, some favorite pieces, and a pop of color!

How To Transform Dollar Store Pumpkins!

How To Transform Dollar Store Pumpkins!

You know those super-ugly pumpkins and gourds that you can get from the dollar store?!

How To Transform Dollar Store Pumpkins!

OK, well maybe they aren’t that ugly…. Perhaps they just aren’t quite the right colors for your home décor? Well, guess what! You can transform those dollar store pumpkins into something beautiful that will work perfect for you!

How To Transform Dollar Store Pumpkins!

It’s really way easier than you are probably thinking, too! I used chalk paint and acrylic paint, but really any type of paint that you have on hand will do!

Umm…. Step one – Ditch the toddler!!!! Just kidding! (Maybe!)

How To Transform Dollar Store Pumpkins!Ok, step one for real now! The first thing that you want to do is mix up your base coat. I had some white chalk paint on hand, so I just simply added some dark green acrylic paint to it, until I created a color that I was happy with. Kind of like a mossy-mint green, I guess?! Next I applied this base coat to all of my ugly dollar store pumpkins. I actually applied two coats of paint for my base coat. This may vary depending on what type of paint you are using…. Just keep applying paint until you have full coverage!

How To Transform Dollar Store Pumpkins!

Looking pretty good, right?! Definitely much better than before, but I still wanted to add a little more detail, so they looked just a little more realistic. Now you may think this is the tricky part, but really it’s quite simple, so don’t panic!

(Hey! Looking for more great pumpkin decor ideas? Check out White Painted Pumpkins and Milk Glass!)

How To Transform Dollar Store Pumpkins!


I just picked out the accent colors that I wanted to add to my mossy-mint pumpkins, and put a dab of each color onto my pallet – uh, I mean mason jar lid! I then dabbed a little of each color onto my paint brush. The secret to get everything blended so well is to keep using the same paint brush for all of the colors, without rinsing in between.

How To Transform Dollar Store Pumpkins!

I then started applying the accent colors inside the grooves of my pumpkins. Then I went back to each groove and “brushed it out” across the rest of the pumpkin, using vertical strokes only!

How To Transform Dollar Store Pumpkins!

I just kept repeating this process for all of my pumpkins…. Playing with the accent colors until I was happy with them. I then went back and repainted my stems. Being the sloppy painter that I am, any extra paint that I got onto my pumpkins, I just “brushed it out”, and blended it in!

How To Transform Dollar Store Pumpkins!

I then let my pumpkins dry.

How To Transform Dollar Store Pumpkins!

And added them to my décor….

How To Transform Dollar Store Pumpkins!

And I really couldn’t be happier with how they turned out!

How To Transform Dollar Store Pumpkins!

Umm, are those fake or real?!

How To Transform Dollar Store Pumpkins!


So go ahead and give it a try! Remember, if I can do it, you can do it! 😉

[Psst! Check out: The Very Best Tips for Cleaning Paint Brushes Quickly and Easily, from the creeklinehouse.com!)


HERE ARE SOME MORE POSTS TO ENJOY!

Faux Pumpkins for Early-Fall Lovers! (Like Me!)

Mason Jar Pumpkin Candle Holders

A Quick & Easy Fall Buffet Makeover!

Get This Burlap Printable Set for Fall, for Free!

A little fall here, a little fall there, 2016 Fall Home Tour!


How To Transform Dollar Store Pumpkins!


*This post may contain affiliate links.